Sorry for the photo dump… But, as life would have it, this is the form my latest (and very late) post is going to take. Outings, birthday cakes, dinners, and holidays… It’s all here. Thanks for sharing in this with me.


Category Archives: baking
Home Sweet Home
Slowly, but surely, our new house is becoming our home. There are many things on our seemingly-endless list of things to do, but going to visit a friend has given me an excuse to slow down and fill my new kitchen with the smells of home.

Juicy local blueberries, gala apples, and some raspberries for good measure. Nothing says comfort like butter,oats, brown sugar, and cinnamon. And there’s not much that wouldn’t look good in this gorgeous pie dish- one of my favourite Emile Henry pieces.

That’s all for now, as I try to capitalize on the little monster’s (always too short) nap.
Homemade Apple Chips
I’ve never met a kid (or adult, for that matter) who doesn’t like something with a crunch. But there isn’t much crunch out there that isn’t bad for you, or questionable, at the very best.
With E being a natural born snacker, I’m always trying to find things that he will like. Things that have some semblance of nutritional value. He loves homemade kale chips (light on the oil and salt) but he doesn’t want that every day.
So I tried my hand at these the other day. They were a huge hit!

With no extra sugar, these apple chips will tackle that craving for something sweet and crunchy.
Homemade Apple Chips
2 small organic Fuji apples
cinnamon
Line two baking sheets with parchment paper. Preheat your oven to 200 degrees.
You can core your apples first, if you like. But I left mine whole. (I just popped the seeds out before I laid the slices on the baking tray.)
Slice your apples into rounds about 1/8 of an inch thick. You can use a very sharp knife (which I don’t have… A shame, I know) or a mandolin (which I do have, and love! I use the Benriner brand.).
Lay the slices down on the prepped baking sheets with plenty of space between each one. Don’t let them overlap or you’ll end up with soggy apples.
Sprinkle each slice with a pinch of cinnamon. Turn the slices over and repeat.
Bake in a 200 degree oven for 2 hours, flip the slices and bake again for an additional 30-45 minutes. The chips should be crispy to the touch. If not, just put them back in the oven.
If the chips still feel just a touch tender in the middle, they’ll firm up when they’ve cooled.
Happy snacking!

Feel Good Chocolate Chip Cookies
E has developed a definite sweet tooth as of late. At the top of his (thankfully, and surprisingly, short) list is the chocolate chip cookie. I actually believe that I could get him to eat pretty much anything if I stuck a chocolate chip on it. But that would probably fall under the category of dubious parenting…
I’ve seen quite a few recipes out there for “sinless” cookies so I thought I would try to make my own version. With Baby Cheeks now in the picture

(Excuse the blurry photo. I blame it on sleep depravation.) any recipe that lets me get away with only using one bowl, a fork, and maybe a spoon or two, has got my attention!

Throw in the fact that I’m not using any butter, eggs, added sugar,or wheat, and you have one happy mama! And the kiddos won’t even know they’re getting some flax seed as a bonus!
These are fairly soft and chewy cookies that will leave you and your littles’ cookie cravings satisfied! You can substitute tahini for the peanut butter to make these nut free.
Ps. Did I mention that you’ll only need one bowl and one fork to mix these up? Oh yeah.

Feel Good Chocolate Chip Cookies
makes 24 small cookies, perfect for little hands
3 small (or 2 large) very ripe bananas
1/4 cup natural peanut butter or tahini
Dash of vanilla
1 tsp cinnamon
Pinch of salt
1 tbs of ground flax seed
1 1/2 cup of quick oats
1/3 cup chocolate chips
Preheat oven to 350 and line two baking trays with parchment.
Mash the bananas well in a large bowl with a fork. Mix in the peanut butter or tahini and combine well.
Next add the vanilla, cinnamon, salt, and ground flax. Stir well to combine.
Add the oats and chocolate chips and stir well until everything is moistened and the mixture is sticky and thick (like cookie dough!).
With a one inch scoop, drop the batter into the lined trays, spacing them evenly. With wet fingers, flatten the mounds of batter.
Bake for 11 minutes until the bottoms are golden brown. Cool on racks.
Enjoy!

The Most Wonderful Time Of The Year: Spiced Ice Box Cake
With all the hustle and bustle of holiday meal preparations, it’s nice to make a dessert that doesn’t require an oven.


For Christmas dinner, I made a spice ice box cake to bring to my sister-in-law’s. With two babes in the house, this low maintenance dessert was just the ticket. But don’t let low maintenance fool you; it’s every bit as (if not more) satisfying as a more involved dessert.
A warmly spiced mousse is nestled between layers of biscuits that slowly soften in the fridge. What you’re left with is a light and creamy “cake” that required no baking at all!


The majority of this recipe is assembly and refrigeration. It’ll be a big hit at the holiday table and easily scales up or down to feed whatever size crowd you’re hosting!
Spiced Ice Box Cake
Serves 12-14
1 large package digestive cookies
1/2 cup sugar
1 1/2 tsp cinnamon
1 tsp nutmeg
1 tsp ground ginger
4 cups heavy cream, very cold
Splash of vanilla
4 tsp unflavoured gelatin
4 tbs cold water
8 tbs hot water
In the bowl of a stand mixer, whisk together the sugar and spices.
In a small bowl, combine the gelatin and cold water. Allow to bloom for a minute or so. Add the hot water and stir to dissolve. Set aside.
Pour the heavy cream into the sugar and spice mixture. Whisk on medium high speed until soft peaks form. Add in the dissolved gelatin and whisk until the stuff peak stage.
On a cake plate or platter, smooth out a few spoonfuls of mousse to anchor the first layer of cookies. Lay the cookies in a round or rectangular formation. Spoon some mousse on top and smooth it out. Follow with another layer of cookies and mousse.
Continue in this fashion, ending with a mousse later. I was able to get in three cookie layers.
Topping the cake with some crushed cookies. Refrigerate for at least 6 hours or overnight. Serve with chocolate sauce.
Enjoy!

Chocolate Zucchini Loaf with Coconut Oil and Coconut Sugar
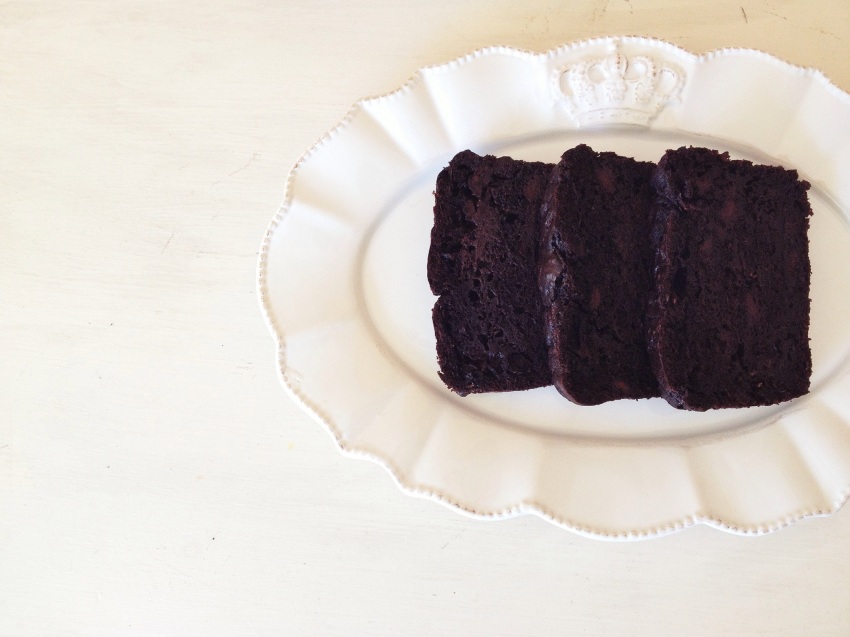
Just a quick post for this one. Pretty low on focus and energy reserves these days… Sometimes, all you want need is a slice of something is undeniably chocolate, without being cloyingly sweet. And if you can hide some veggies … Continue reading
Matcha and Vanilla Mousse Cake

For my brother’s birthday this year, I gifted him a birthday cake. I feel that, more and more, handmade gifts are more meaningful and heartfelt than anything that can be purchased. It’s also a great idea for people giftees who … Continue reading
Whole Wheat Flatbread Pizzas
There is something that is unspeakably satisfying about making bread. The smell of the yeast, the push back from the dough beneath your hands as it develops, the way the motions force you to take the time… The give and take of the whole process.
We had these for lunch today and Baby E enjoyed every bite. Success!

Crispy edges and bottoms with a chewy, hearty middle. Load it up with your favourite toppings and I’m pretty sure you won’t find anything better than this.
We topped ours with homemade barbeque sauce, sliced turkey from the deli, red onion, spinach, and cheddar cheese. Oh yeah.
Whole Wheat Flatbread
This will make 6-8 individual thin pizzas or lots of teeny tiny ones. You decide how big you want to go.
1 and 3/4 cups warm water
1 heaping tbs yeast
2 tbs sugar
Big pinch of kosher salt
Splash of olive oil
2 cups whole wheat flour
2 cups all purpose flour
In a large bowl, dissolve the sugar in the warm water and sprinkle the yeast over top. Stir and allow to foam. It will take about 10-15 minutes depending on the water temperature and the freshness of the yeast.
Stir in the salt and a big splash of olive oil.
With your favourite wooden spoon, stir in the flour one cup at a time. Once you can’t stir anymore, get your hand in the bowl and work in the rest of the flour.
Once that becomes cumbersome, turn the dough out onto a lightly floured countertop and work out your day’s frustrations. When the flour has been all worked in and the dough springs back when you dimple it with your finger, it’s ready for a quick rest.
Place the dough ball in a greased bowl and cover with a damp tea towel. I like to place it by the preheating oven to speed up the process.
This flat bread isn’t going to need a full rise so if you leave it for 30 minutes or so, it’ll be ready. Or you can leave it to rise for up to a hour or hour and a half.
Preheat your oven to 435 degrees and pour a good amount of olive oil onto a sheet pan. Spread the oil about with your hands.
While the dough is rising, gather your toppings. It’s up to you what to use.
Just don’t load the dough too much or you’ll end up with soggy pizza.
Once the dough has rested, punch it down and pull off a small handful. Pull and stretch the dough to the desired size and place on the greased pan.
Top and bake in the preheated oven for 12-15 minutes, until the edges and bottom are crispy and golden brown.

The Accidental Trifle: Chocolate Zucchini Cake, Whipped Cream Cheese and Chocolate Pudding

I just had an awesome visit with my friends Sarah, Rosa, and Felicia today. Needless to say, I left Baby E at home with daddy. That’s the only way I get a chance to actually engage in any degree of … Continue reading
Spelt and Almond Olive Oil Cake
I can’t believe it’s been four years! Four years since D and I have been married. It sounds long when I say it out loud, but it’s just a blink of the eye really. It’s amazing how much can happen in so short a time. A new home, a baby (and another on the way), masters degrees, vacations… And out of all those events, we learned about ourselves and each other and continue to do so each day.
To help us celebrate this milestone, my Inlaws treated us to lunch. We decided to get take out and have it at our place with them so that Baby E could get to his nap in a timely fashion. As anyone with a toddler can attest, no-nap babies can be fairly unpleasant to be around.
To round out our meal, I made a quick cake. It’s not really a celebration without a piece of cake, now is it? Having embarked on this cake expedition rather last minute, I needed to use what I had on hand in the pantry. It’s awesome when you don’t have to head to the store to make one specific thing. As a result, I came up with this spelt and almond olive oil cake. The best part? You don’t need to break out the stand mixer (as much as I love mine dearly)!


I baked the batter in my favourite ramekins to make (slightly larger than) individual servings. The cake came out light, airy, and with a fine crumb. It struck a nice balance with the lemon cream (leftover from the parfaits that I had made earlier), a small scoop of no churn ice cream, and a light dusting of icing sugar.


Spelt and Almond Olive Oil Cakes
Makes one 9-inch layer or 6 ramekin cakes
3/4 cups almond meal
1 cup organic sprouted spelt flour
2 tsp baking powder
1/2 tsp salt
1/2 cup whole milk
1 tsp vanilla
3 large eggs
1/2 cup olive oil
1/2 cup plus 2 tbs sugar
Preheat oven to 350 degrees and grease and flour the ramekins (if using) or grease and flour one 9-inch round cake pan.
In a bowl, whisk together the almond meal, spelt flour, baking powder, and salt.
In the measuring cup, mix together the milk and vanilla.
In a large bowl, whisk together the olive oil, eggs, and sugar.
Add 1/3 of the flour mixture and whisk gently. Then add half the milk mixture and stir to combine.
Whisk in 1/2 the remaining flour mixture, followed by the rest of the milk. Add in the rest of the flour mixture and whisk gently to combine.
Pour (or ladle) into the prepared baking vessels and bake for 20-25 minutes in the ramekins (30-35 minutes as a 9-inch layer). The cakes should be golden brown and a cake tester should come out with just a few crumbs clinging to it.
Allow to cool for 5-10 minutes on a wire rack in the ramekins before removing. Remove the cakes and allow to cool completely on the wire racks.
Once completely cool, you can slice and dress the cake(s) as I have, or as you like. Some suggestions are: whipped cream and berries, marmalade or preserves in the middle and a dusting of icing sugar, roasted nectarines and a drizzle of honey, caramelized apples and a dollop of crème fraiche… I could go on, but I don’t want to bore you! The possibilities are endless.
